The Cover Theme Part 2
Segment 4: Deceptions
This segment, although short, does a good job of preparing the player for the climax of the cover theme that comes in chapters eleven through thirteen. One of the lessons we learned in Reverse Design: Super Mario World is that one of the most important things a tutorial can do is to condition the player to accurately sense danger. In any action genre, novice players can overreact to new stimuli and unnecessarily put themselves in even more danger. A good tutorial will condition the player to sense danger and take action appropriately, which is the first thing a player needs to be able to do in order to succeed at and enjoy a game. Half-Life does a fine job of this in its early stages and first cover segment, teaching the player about the speed and behavior of enemies as well as teaching cover discipline. The point of this segment, on the other hand, is to refine that cover discipline—to take it to a more nuanced level.
Before this segment, the player was mostly safe to wait in cover. In the previous segment, the player had to cross dangerous open spaces to get to cover, but it was fairly clear where the safe places were. In this segment, cover is still a safe place, it's just that what the player thinks will be cover isn't always actually cover. Take the first set piece from the segment: this cage looks safe, but it's actually going to drop into the water where an Ichythyosaur is waiting.

As it turns out, the cage isn’t what the player was expecting in terms of cover. There's another plunge in set piece 9-2, in which an apparently safe box-top is not a platform but in fact cover from the two Vortigaunts that teleport in.
The player ends up in a cover-based set piece totally by surprise, and has to figure out what to do with that cover once already there. Set piece 9-5, meanwhile, is not built upon total surprise as much as it is upon misdirection. The freezer's global damage effect makes it obvious that the player has to get through this set piece quickly.

Again, there's plenty of cover; it's just that the set piece deceives the player about its use. This trend ultimately culminates in the introduction of the black-ops assassin in set piece 9-7. Here, the high mobility of this new enemy makes it difficult to know what is and isn't cover.

There's plenty of excellent cover everywhere in this set piece, but it's quite hard to determine which parts of it are useful, because the enemies here follow unusual behavior patterns and move frequently.
The goal of all these deceptions is to cause the player to think more critically about the use of cover—to think a step further into the future about cover and the disposition of enemies. In segment 1, the player saw the cover descriptor and followed it to the relevant cover, from which point Freeman could fire at the enemies in relative safety. Segment 3 introduced significant amounts of movement between described covers. This set piece gets the player to keep thinking after entering cover, and it does so by giving the player plenty of cover but then subverting its typical use. This is all to prepare the player for the climax of the cover theme (temporary cover and multi-front combat), in which the player will always have to stay on the lookout for the next piece of cover and the next tactical move.
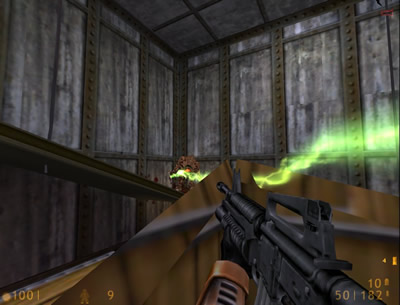
SET PIECE 9-1: Ichythyosaur
This set piece offers a simple but effective deception. Coming upon the crossbow, the player will naturally expect to enter the cage and use the crossbow to fire safely down at the Ichythyosaur below. The setup seems like an obvious way to introduce a new weapon, and offers the ultimate cover: the enemy can’t even reach Freeman where he stands in the cage.

The cage plunges into the water, forcing the player to make a quick decision (which is the point of this segment). Does the player use the cage to shoot the Ichythyosaur to death quickly, or does the player try to get back to the surface before fighting? The cage is still effective cover, and it’s actually easier to aim at the giant creature from beneath the water. Either way, the decision has to be quick and calculated. The only real problem with this set piece is that it’s impossible to tell how much HP the Ichythyosaur has, and how many shots will bring it down. For players opting to use the underwater cover, this is a confounding element that simply doesn’t need to be there. In other circumstances, the unknown HP would not be a problem, but underwater, it’s just an unfair design decision.
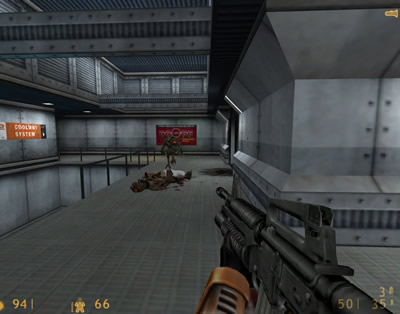
SET PIECE 9-2: A Baited Trap
The deception in this set piece is small but central. The center box looks like a great shortcut across a room full of barnacles. Instead of wasting ammo killing barnacles, the player can actually gain ammo by jumping onto the crate.

Making this jump, however, will cause the crate to collapse and two Vortigaunts to teleport in, blocking both exits. The box also obscures the player’s view, but it doesn’t hide the sound of those two Vortigaunts warping in. Just like the Headcrabs blocking the side-paths in the next set piece, this is a type of deception. There isn’t much real danger here, because the two Vortigaunts don’t have great firing angles on the whole room.
It’s easy enough to use the walkway or remains of the box to shield Freeman from fire. The thing the player doesn’t want to do is panic and start firing blindly or run into one of the barnacle tentacles while fleeing. As long as the player doesn’t buy into the deception, the set piece is easy, which is the whole point.
SET PIECE 9-5: Frostbite
This set piece brings back the forced haste of set piece 9-1, but this time around that haste takes a form that resembles this game’s Quake heritage. Rarely does the player have to truly “run and gun” in Half-Life as one would in Doom or Quake. Extensive cover, accessory spaces, laser trip-mines and enemy infighting are all alternatives to the kind of hasty strafing that made sense in earlier FPS games. Half-Life is a more methodical game. This set piece takes that away by having an ambient damage condition; Freeman will take damage from the extreme cold of the freezer.


The ambient “cold damage” acts as the cover descriptor. Before this set piece, the best way to engage a Vortigaunt is to hide until it fires, then take advantage of its cooldown period, but there isn’t time for that. The player will naturally try to run around the enemies instead, using the pillars as cover. This is where the Headcrabs come in, as they block the near-side alley behind the cover. They don’t do much damage, but they’re not supposed to. Just like in set piece 5-1, the purpose of the Headcrabs is to cause the player to panic. This is a simple and brief (but incredibly effective) deception that shakes up what the player has learned about cover up to this point in the game.
The only problem I have with this set piece is that this wonderful inversion of the typical uses for cover isn’t developed more fully. It would have been nice to see a few more set pieces that involved a global damage constraint which forced the player to use typical cover in non-typical ways. Later on in chapter 17, this problem emerges again, when there are two set pieces with incredible potential that never see any development at all. There is no perfect game, however, and the biggest imperfection in most games is that they could have done more with the designers’ best ideas. This is one of those cases.
SET PIECE 9-6: Caterpillar Hallway
This is a short set piece, but one that advances the use of cover in a startlingly clear way. The setup seems simple at first; there are two Vortigaunts at the end of a hallway, and the cover is so clearly designed that it describes its own use.


The player can easily close the gap between Freeman and the Vortigaunts by ducking into any of the several niches that line the hallway. This is where the deception comes in. After the first two Vortigaunts are dead, two more will teleport in. One of them will be in front of Freeman and present little or no challenge, but the other Vortigaunt is directly behind him.


As was the case in the previous set piece, this trick is designed to make the player panic. The cover works exactly the same way for the last two Vortigaunts as it does for the first two—that’s the beauty of all that segmented cover. The player merely has to duck into cover to evade shots from two angles rather than one, which will become the norm in segment 6. The linear structure of the hallway and heaps of cover (and absence of alien grunts) keep it from being quite as difficult as those later set pieces.
SET PIECE 9-7: Devil’s Playground
This set piece combines the primary design idea of segment 3 (cover-to-cover dashes in large areas) with the deception aspects of segment 4.
The black ops assassins here are unlike anything the player has seen, and their behavior includes an important deception. Most enemies in the game charge at Freeman or stay stationary to fire at him. The black ops assassin is highly mobile—but also flees from Freeman whenever he gets close, making spectacular flips between different heights in the terrain. It’s this fleeing behavior which accounts for the central deception of the set piece. The high mobility and slender frame of the black ops assassins makes them hard to hit at range. Charging up onto the elevated area ought to pin them down for easier fire. But the ability of the assassins to simply jump away means that all the health the player sacrificed while charging in was wasted, negating that strategy.
The evasiveness of the assassins makes the set piece and all the cover it provides considerably more interesting. This set piece might actually have the most cover of any in the game, in terms of the number of objects, with at least 25 pieces of individual cover, depending on how you count certain containing walls. The amount of cover is especially curious considering that the map is organized into a slightly irregular grid—it’s almost laid out like a modern city.


What tends to happen is that the player will sight and fire on one assassin, that assassin will evade, and one of the other two assassins will do twenty points of damage or so to Freeman. How is the player supposed to manage this set piece without having to merely fire grenades and bullets everywhere? The answer lies in the lessons of the first two segments. The lesson of segment 1 is to find the right cover to survive by using a descriptor. This set piece has a descriptor—it’s the sniper shot that kills the guard. The long range of the assassins’ weapons, and their hiding behavior are demonstrated by this shot, telling the player that Freeman should definitely be hiding behind something tall and solid rather than charging. The lesson of the second and third segments is to not merely hide, but to use cover and level architecture to dictate the terms of an engagement. In this set piece, the mobility, range and peculiar behavior of the assassins make it much more complicated than merely picking one or two angles. The player has to steer Freeman from cover to cover every few seconds as the assassins change their angles. This is why there’s so much cover, and why it’s organized in such an orderly way; the player doesn’t have time to worry about running into a surprise wall. The player’s concentration is taken up entirely with hunting the assassins around every corner, making sure to change angles all the time and never being cornered.
Interlude: Irregular Set Pieces
In chapters 11 and 12 there are a few set pieces that don’t fit a larger pattern in the design segments. When the designers were creating Half-Life, they probably did not intentionally create design themes and segments; these things evolved naturally. Some set pieces felt “right” when placed next to other set pieces, or the designers saw obvious connections between a few of them. Moreover, I doubt very much that all the set pieces were created in order; that would belie many of the things we know about set piece production. Even teams with exceptional communication, time and creative freedom (like the Valve staff had) would be hard-pressed to plan everything in their game out before making set pieces. Thus, thematically extraneous set pieces appear and we have to account for them.
SET PIECE 11-3: B-Teams
This set piece punctuates the otherwise arena-oriented eleventh chapter with an expansion/evolution of set pieces 4-3 and 8-2. Accessory spaces are back, and they're more numerous and more robust. The laser "puzzle" which follows this set piece provides cover for the many wandering enemies in these hallways.


One of the interesting things about this set piece is its high variability. It’s almost like an arena dynamic except that there’s so much cover everywhere. The infighting between Bullsquids and marines can have very different results from encounter to encounter, and varies especially between difficulty levels. That said, it doesn't really matter who or what Freeman is facing; the same accessory-space strategy applies if the player is looking to avoid damage. The cover in each of the office alcoves makes up for the fact that the apertures are wider than in either of this set piece's ancestors. The width of the apertures can be problematic, though, if Freeman is on the outside of a room facing an enemy within it, although this isn't as common as the reverse.
SET PIECE 12-2: Chopper 1
This set piece seems like it almost might belong in the arena theme, but I don't include it there because it doesn't operate like an arena set piece. At first it seems like there's no cover, and there's definitely not the typical Half-Life kind of cover. The only thing that qualifies as cover is the large wall which can be used to obscure the distant gun emplacement.

That bit of wall cover is completely essential, however, and very useful. The player can easily be shredded by the combined firepower of the gun and the helicopter, but with the wall allowing for some pop-and-shoot play against the gun while obscuring half of the helicopter's flight pattern, it's much easier. This is the kind of "cover" we might have seen in Doom, and it serves the same purpose. Replace the heavy gun and marines with some type of techno-demon, and this set piece might fit in an older game.
The only other thing worth mentioning here is that this set piece suffers especially from the big flaw in Half-Life bosses: the feedback when attacking the helicopter is unclear. The player has a hard time knowing how many hits the helicopter will take before dying. There's sometimes no clear indication that the helicopter is even taking damage when it's hit—a thin trail of smoke is the only sign the chopper is nearly dead, and it’s often hard to see at a distance. There's no reason for these feedback mechanisms to be unclear; even a few clear sound files and texture changes indicating hits and progressive damage would have been easy to implement to great effect. These things do exist in Half-Life, but they’re often (as is the case here) too subtle to notice during a firefight.
SET PIECE 12-3: Chopper 2
A direct evolution of the previous set piece, this encounter is much more in line with the kind of cover-based combat seen in the rest of Half-Life. The player has to face off against a helicopter, but with the advantage of cover.

Technically the addition of a new element makes this set piece an evolution of the previous one, but you can see how the cadence structure doesn't apply perfectly to Half-Life here. This set piece adds cover more significant than just a wall, which actually makes the child challenge easier than its parent, which is very rare. There is a more typical evolution/expansion here, though: the helicopter's behavior becomes more targeted and aggressive. Instead of merely soaring around in large loops—with only a few seconds of attack per loop—this helicopter fires quite frequently and for longer periods of time, making the cover necessary. Still, this is an easier fight for inexperienced players because they've been trained to use cover, and this set piece provides it.
Segment 5: Temporary Cover
This segment complicates the player's relationship with cover by forcing the player to move out it on a frequent basis. Each set piece in this segment (from 12-1 to 12-7) forces the player to move from cover to cover rapidly, without an extended period of safe pop-and-shoot gameplay to which the player became accustomed in previous segments. The primary driver for this movement is the enemies' increased reliance on explosive weapons. It's strange to think of explosives as being elegant, but in the context of Half-Life's game design, they are. I want to take a moment to define what I mean by elegance in game design. A game’s design is elegant if it:
- Continually increases in complexity and challenge
- Doesn’t add too many new game mechanics (which would result in "qualitative wildness")
- Doesn’t simply pushing the quantitative difficulty (i.e. simply adding more marines, increasing the damage of bullets, etc.—this results in "quantitative brute force")
This segment of Half-Life adheres to these principles well. There are not really any new mechanics; although the player has new weapons to play with (like the tau cannon) these weapons only differ very slightly from the earlier loadout. Jumping, climbing, running and ducking are all the same as they ever were. The quantitative aspects of this segment are mostly in line with the rest of the game. The average number of enemies per set piece is not markedly higher than the average from other set pieces. Bullets do not do more damage now than they did before. The only really “new” thing is the several armored vehicles which appear now. They have more HP and do more damage per hit than most enemies, but there is only ever one of them in a set piece. The armored vehicles and their explosive rounds can shred cover, making movement necessary in a hurry, as in set piece 12-7. Similarly, the marines in this segment seem a lot more willing to use grenades, and they also seem to have more of them. Without ceilings or hard corners to stop them, these grenades can land inside cover, meaning that Freeman has to flee when those grenades land, as in 12-6.
There are several reasons why the sudden emphasis on explosive weapons is still elegant. First, explosives have been a part of the game from the very beginning; they player understands them and has lots of experience dealing with enemies who use them. Even though there are more explosives in play now, they are far from being a new mechanic. Although they do more damage than average rounds, it's not a case of numerical brute force because both the tank turrets and grenades are much slower and easier to evade than gunfire. Indeed, it is the act of evading these explosives which makes the cover in this set piece temporary. And so although the player is confronted with an enhanced challenge, that challenge is mostly made up of elements already in the game that are cleverly reiterated. That is elegance in game design, and that is why this segment (across chapters 12 and 13) is probably the best part of Half-Life.
SET PIECE 12-1: Warm Welcome
The new segment begins with a clear indication of what's in store for the player in chapter 12. The layout of the set piece has some familiar elements configured in a new way. The best way to understand it is by looking at a layout of the action, because everything in this set piece happens quickly.


All of the marines are running for the cover in the middle of the area, running toward one of the oldest cover descriptors: explosive barrels. The barrels are on both sides of the sandbag wall, meaning that some of them must be destroyed if the wall is to be usable as cover. This makes either of the retreating marines on the right or left an attractive target; simply time the detonation of the barrels to match their retreat. This frees up a section of wall to be used in defeating the other two marines in the back. Interestingly, because of the other set of explosive barrels, the last marines can also be blown up.
Why are there so many explosive barrels? One of the defining aspects of this segment and chapter is the increase in enemy firepower.

Helicopters, tanks and large numbers of marines (who use grenades more frequently than in earlier chapters) make it so the player can't sit as safely in cover, nor for long. This set piece is no exception; the marines here, especially the elite one, will launch grenades at Freeman if he stops moving for too long. The explosive barrels are in place to show the player how quickly this segment's set pieces operate. Either the player blows up the enemies, or they blow him up. Cover in this segment is only meant to last for a few seconds. In that regard, the explosives describe the action of both the set piece and the whole segment.
SET PIECE 12-4: Alert
This set piece is built on the same design idea as 12-1, but it's a more subtle and complex implementation. The placement of enemies in this set piece and their aggro radii are configured so that Freeman walks into a trap no matter how he approaches. The marines are all on one side, so the set piece hasn’t become a case of fighting while completely surrounded, but it’s still a situation that will require careful, tactical movements.


On approach, none of the marines are visible at all. In fact, it doesn't even look like there might be hiding places, so the player's clearest path forward is in between the boulder and the left-hand wall. The impetus for changing cover in this set piece is that the marines can and will move to flank Freeman, and the structure and size of the set piece make that fairly easy for them to do so. The trick to the battle is kicking the marine in the boulder out of his cover, and then using that cover for Freeman. This at least gives the player a chance to use the lessons of segment 3, and get a favorable angle of fire for a few seconds. That said, the marines don’t tend to line up in convenient ways because they have so much room to move around.

There’s also the issue of the helicopter overhead, if the player hasn’t already defeated it in a previous set piece. The player can use the other sides of the boulder as cover, or even the edges of the cliff, but there's no "clean" spot to isolate each enemy. The player has to keep moving from cover to cover in order to flank the enemies before their combined fire depletes Freeman's health. The cover spots are also not nearly as obvious as they were back in the previous segments; all those neat boxes and walls have been replaced by irregularly-shaped cliffs and boulders. The game is challenging the player in new ways, even though it's all based on old skills.
SET PIECE 12-6: Peek-a-Boo
The previous set piece presented the player with temporary cover by means of a charging/collapsing formation of marines. This set piece is, in one sense, more brutal than that. Instead of charging marines firing their assault rifles, what drives the action in this set piece is a huge abundance of explosive weapons. The most obvious problem is the tank that occupies the northeast corner of the set piece and outputs a very high level of damage. Indeed, the tank turret serves as a fairly good cover descriptor. It takes about three seconds to turn 60 degrees, by which time the player ought to have ducked back into the cover of the tunnel system because Freeman won't survive long under its fire.

The tank’s gun arm swings slowly and fires in a straight line, so while it is highly damaging, it is also fairly avoidable. The real danger is the grenades which the numerous marines can and will throw. It's not easy to see when the marines are about to throw grenades, and even harder to see the grenades in flight, which is why the movement of the tank turret works as a better cover descriptor. The marines in this set piece seem to throw grenades more quickly, more frequently, and in greater numbers than any other group of marines in the game. What's more, they're fairly accurate with them and can easily land them in whatever cover the player chooses to use. Thus, the player ought to know that every piece of cover in the set piece is temporary, because it will be barraged by explosives after a few seconds of use.
The only real refuge is in the underground tunnel system which connects to the surface at four points along the perimeter. This refuge isn't technically cover, because the player can't fire usefully while in it, but it does allow for a unique form of movement around what otherwise might have been an arena-style set piece. Each exit of the tunnel system offers a different tactical situation, although all of the exits come up in the line of sight of the marines who stand along the set piece's outer wall.

Because of the attendant marines at each exit, there's no way to pop up without taking fire and then grenades. The only thing the player can do is pop out and kill enemies quickly from any of the three exits that are in the tank's field of fire. Magnum rounds, assault rifle grenades or bursts from the tau cannon will all do nicely to accomplish this, and the set piece could proceed quite interestingly as the player moves from temporary cover to temporary cover.
There is a problem with this set piece, though, which obviates what might have been an interesting game of machine-gun peek-a-boo. The exit behind the tank has inadvertent advantages that relate to enemy AI programming rather than the structure of the level design. Above, we saw that the back exit does lie in the field of the fire of a marine, so climbing out of the tunnel is the same. Following this, one more marine will also aggro based on the sounds coming from the first gun battle.


Some of the marines in the area ahead of the tank turret are not configured to aggro when Freeman appears behind the tank, even when firing his weapon. At every other location, every single marine (except the one in the back) will aggro. Half-Life, as a whole, doesn't tend to focus on "detective work" approaches to set pieces the way Goldeneye or Deus Ex do. There is sometimes a choice in how to approach a set piece, like in chapter 8 when the player can pick which faction to attack first. Normally, though, that choice doesn't revolve around when or how enemies will detect him—especially not in large, open setups such as this one. So it seems that the relative security of the area behind the tank might be a mistake, based on what we see in the design. Several marines will charge back there to take Freeman on, and they can definitely kill him. The one back area, however, is significantly easier to get out of safely than any other exit from the sewers. The result of this safe zone is that the player can aggro the remaining marines in a piecemeal fashion and turn the back area into a kind of accessory space like the ones in chapters four and eight. The small aperture created by the tank works perfectly as a place to isolate one or two charging soldiers at a time. The marines are a little less likely to lob grenades in the back area than they are in the front, although they will still throw them. So while exploiting this exit may not have been what the designers intended, it's a good example of how a cleverly designed encounter can go wrong when one or two variables are forgotten.
SET PIECE 12-7: In and Out
After the last two long and grueling set pieces, this one is a nice change of pace, and it keeps with the theme of temporary cover well. The APC at the end of the passage dominates this set piece, firing rockets at Freeman even when he is behind cover. All of the cover in the immediate area is destructible, and the rockets will break it in one or two shots.


Some of the cover is even explosive, augmenting the destructive power of the APC's rockets. It's obvious to the player that what cover exists here is only meant to absorb one or two shots before Freeman has to move on. In the previous two set pieces, the player had access to rocket ammunition. If the player has any of that remaining, he or she can blast the APC at a distance. This is no easy task; the player has not had much enforced practice with the rocket launcher, and has never faced return rocket fire. Steering the player's rockets toward a small target is a moderately difficult task, and dodging the enemy's rockets is also a moderately difficult task. Doing those two things together, however, is a lot more challenging, especially at the range this set piece demands. Naturally, it makes sense for players to have another option.
The player does have, on the far right, an exit to an area that is sheltered from the rocket attack. Below a fairly small aperture there are two marines who primarily attack with assault rifles from a lowered position. They are easily dispatched, but what they guard is a large munitions dump which provides explosive ammo. The grenades, satchel charges and ammunition from this dump give the player a variety of ways to destroy the APC without having to use rockets, which can be difficult since the player has so little exposure to them and not much ammo. Once the player is in cover at close range to the APC, the set piece isn't that hard. Really, the point of this set piece was to punctuate the long, grueling set pieces all around it with a shorter encounter that still maintains the theme of temporary cover.
SET PIECE 12-9: Call in the Cavalry
This set piece is a mutation of 12-7, featuring another armored vehicle parked at a distance which will blast Freeman with explosive rounds. This time, though, there are also two marines as well, one of which is an elite. The previous set piece also had two marines, but they were totally separate from the tank. Here, the marines will emerge alongside the tank and charge Freeman's position, often pinning him against the wall in pursuit.


What makes this set piece more of a mutation than an evolution is the permanence of the cover. The corner behind which Freeman can stand isn't destructible, and it isn't subject to irresistible bombardment. So really, this set piece is difficulty-neutral compared to the previous set piece, while still being a close relative of it. That close relation, and the stark contrast it presents, is the reason why I include this set piece in the temporary cover segment, even though it doesn’t involve temporary cover. The contrast is useful.
There is a second part to this set piece which doesn't bear classification well. Below a certain HP threshold, the marine will run from the set piece to alert two other marines who are located inside the building around which the set piece takes place. Those marines will become alerted (although they won't rush out into the set piece proper) and will kill a guard who opens a bonus room full of ammo. It's easy enough to prevent any of these soldiers from closing off the bonus room—if the player knows about it in advance. If the player had some idea of what was at stake and what he or she was supposed to do, then this would have been a good example of an optional (bonus) challenge to the set piece. Without knowing what the marine is doing, where he is going, or what's at stake a lot of the thrill of getting that bonus room is lost.
SET PIECE 12-13: Nooks and Crannies
This set piece begins a transition between segments five and six. Starting with the wall that explodes, the player is faced with a (relatively minor) threat from an unexpected angle. The exploding wall is more or less the same as everything in this segment; it simply ceases to be useful as cover. The rest of the set piece is a little more confusing.


When the alien grunt in the room on the other side of the wall shifts its aggro from the marines to Freeman, the player can no longer use that room to snipe the battle below, but rather has to fight through the unusually small aperture those two rooms share. Finally, the last grunt has to be neutralized from the cover across the yard.

Again, this isn't quite the temporary cover that this segment normally puts forward, but it doesn’t quite reach the 360-degree threat of many of the set pieces in the next segment. The small apertures through which the grunts fire and the elevated starting position of Freeman give the player too much of an advantage to consider this part of the next segment. Moreover, the fighting between the marines and the aliens means that the player might have multiple areas of danger to deal with, but often the enemies will be distracted enough that the player can ignore one or other quadrant of the battlefield for a moment.
Segment 6: Multi-Front Combat
As the last full segment of the cover theme, this segment focuses on situations in which Freeman is surrounded by enemies and has to fight (or evade) on multiple fronts at the same time. Although there have been several set pieces in earlier segments during which the player could accidentally wind up in the middle of a large firefight, this segment forces the player into those situations. The goal of this segment is to evolve the player's cover discipline into its highest form. The previous segment forced Freeman to move from one piece of cover to another quickly, to avoid being blown up. Usually, though, each piece of cover in the previous segment had clear safe/dangerous sides, even if they were only temporarily safe. Even 12-6, in which the player might have to move between pieces of cover a dozen times, at least put a wall behind Freeman's back and the enemy in front of him most of the time. That's going to change in this segment, and it's mostly going to be a product of teleporting enemies.
There have been plenty of examples of enemies teleporting in before this segment, but up until now those teleports mostly happened in front of Freeman or on his flank. In most of the set pieces in this segment, there's going to be at least one dangerous enemy teleporting in directly behind Freeman. What's more, this teleport almost always occurs after the firefight has started. Set piece 13-1 even uses a time-delayed script to surprise the player twice with teleporting Vortigaunts to the rear of the battle. Beyond even that, most of these teleports either come in groups or warp in a grunt right on top of Freeman's covered position. Earlier teleports, featuring a stray Vortigaunt or Headcrab, tested the player’s ability to stay calm and get off a quick shot before the teleporting enemy could aim and fire. The numbers and toughness of the enemies in this segment make that impossible. Grunts have a habit of not chasing Freeman, but when they teleport in either on top of him or behind him they're a lot more dangerous. Both of those things happen in this segment, and so it's very important for the player to find cover where they can.
This segment is still a part of the cover theme, and cover plays a very important role in it. Much like the previous segment, though, the player rarely gets a chance to be stationary in cover and fire at leisure because there are enemies at several different angles around Freeman. This segment, however, does not reward the kind of haste that the previous segment did. In set pieces 12-1, 12-6 and 12-7, the player had to rush from cover to cover as explosives and other high-damage munitions rained on (and destroyed) that cover. Here, the player has to be quick, but also must maintain extremely tight cover discipline around corners. In set pieces 13-1 through 14-2, rushing around a corner can get Freeman shot to bits very quickly. Thus, the secret to this segment is to maintain the tightest possible cover discipline by using every advantageous angle of every small piece of cover or architecture. This is the evolution of cover discipline which the designers are building for: greater precision, patience and analytical thinking built on top of the speed which the last segment cultivated.
SET PIECE 13-1: Camping Out
This set piece challenges the player with a variety of surprises, but also does a few things to let the player know the kinds of challenges he or she is going to see going forward. Aside from teleporting enemies in directly behind Freeman, there are two key features in this set piece that make it even more deceptive. The most obvious is the architecture of the level.


There are already two grunts and a Vortigaunt in place, but none are visible. Of course, any room like this should look suspicious to the player who has made it this far in the game, but that's where the other part of the deception comes in. There's a guard who will usually follow Freeman up to the encounter. His presence may not affect every player’s approach to the set piece, but in most of the previous escort segments, the player didn’t actually bring guards into set pieces at all, so his presence here serves to lower the player's sense of threat a little bit. This is especially true because the guard stands behind Freeman, and so the player is more likely to imagine that even if there are enemies ahead, there are not going to be enemies behind.
The truth of the set piece is that there are enemies in front and behind, and the guard's presence means nothing. Aside from the imposing fact of the two grunts hiding in this set piece, there's another grunt that is going to teleport into the set piece's starting space, along with two Vortigaunts.

Good cover discipline can reduce the number of enemies that Freeman has to face at once. The enemies behind each piece of cover are effectively in isolation as long as the player maintains a good isolating angle. This strategy only mitigates the difficulty a little bit, though, because every grunt and Vortigaunt can deal significant damage to Freeman before dying. Note the placement of the right-hand grunt and Vortigaunt, too: they're not both behind the crates.

Instead, they're positioned to push a panicking player back out into the sights of the enemies who have just teleported in. Even if the player doesn't panic, crossing the room to take a different angle on the rearmost grunt will place Freeman in the field of fire of the enemies which have teleported in.
This set piece isn't all cruel surprises, though; once the player is able to understand where all the enemies are, the cover is actually quite good. Both objects in the middle of the room are tall, wide and durable. The grunt and Vortigaunts that teleported in behind will not usually charge, so it's easy to use the middle boxes to snipe them. The cover play in this last part of the engagement is fairly orthodox—but player has to do everything exactly right in order to earn that cover. There's one last surprise though, in the final Vortigaunt who teleports in on a time delay after the other teleporting enemies are defeated. That one Vortigaunt isn't a huge threat; it's just the developer's way of communicating how unpredictable the upcoming teleport-oriented set pieces are going to be.
As a last note I want to point out that there is a secret option in this set piece. At the back of the set piece where the teleports happen, there is also a switch to activate a turret.

The problem with this is that the player has to activate this in advance of the whole set piece and then dash through the turret’s field of fire in order to gain any benefit from it. First-time players aren’t going to figure out how to use this turret until several deaths and reattempts in this set piece, if at all, but it is a nice bonus for veterans coming through the set piece on a higher difficulty.
SET PIECE 13-2: Rear Assault
This set piece, one of the few optional set pieces in the game, is an evolution of 13-1. The big change is that some of the cover is now destructible, so the player has to be careful with what kind of weapons Freeman uses.


The cover is also a little narrower, meaning that the seeking bullets from the enemy weapons will be able to get to Freeman unless the player maintains very tight cover discipline. The final grunt will teleport in behind Freeman once the first two are dead, forcing him around the cover, and turning this into another surrounded fight. The placement of that final grunt is deadly, as it has a great vantage to shoot unaware players. As long as the player doesn’t destroy the boxes during the confrontation with the first two grunts, however, the cover should be more than enough to deal with a single grunt. That involves a kind of prescience the game hasn’t really been teaching. With so much cover being destroyed in the previous set pieces, it’s a little unfair that the designers are asking the player not to destroy cover here.
SET PIECE 13-3: Rock Hole
This set piece recalls the design idea that began in set piece 12-6 (armored vehicles with powerful turrets), and deals with it for the last time. Whereas that set piece was about temporary cover, this set piece has cover that’s a little more durable and defensible. Here the player emerges to see another armored vehicle with a powerful gun turret blocking the way forward. There are also a couple of marines to the side.


The marines have a habit of not coming through the chokepoint in between the two boulders but instead coming around the back side of the boulder farthest from the tank. Back in those other set pieces, this would put Freeman on the move. The tank turret will kill everything beyond the two boulders, however, and so the cover discipline here is a little finer than those earlier set pieces. All in all, the emphasis on control instead of speed here means that this plays a little more like the segment it’s in (multi-front combat) than the earlier versions which were clearly about temporary cover. The player has to defeat those marines first in order to get the time and proper angle to take on the tank looming behind the cover.
SET PIECE 13-5 T-Junction
This set piece is laid out simply, and in its simplicity, it’s a great example of elegant design. The whole set piece is a T-junction of hallways which would not be out of place in Wolfenstein 3D. The interesting part of the set piece is the enemy complement and their positions. There are grunts on either end of the hallway and the rare alien turret appears as well. There is a cover descriptor too: the collapsing wall.


The collapsing wall forces the player to back up behind into the connecting hallway; doing so will obscure the grunts and the turret. Ducking back into the connecting hallway—out of sight of the enemies—will remind the player that grunts don’t always charge like marines do. Thus, the set piece has to be played by ducking in and out of the grunts’ lines of fire multiple times. Several things make this play more interesting than typical pop-in/pop-out cover mechanics. The first is that having enemies on both ends means that there’s still a fight on two fronts. The second is that the grunts only fire homing rounds, meaning that Freeman can’t just hide behind the very edge of a corner, or else the homing rounds will find him. The player has to duck Freeman far back into the connecting hallway in order to dodge those homing shots.

The player must also perform significantly more of these pop-out maneuvers than in earlier set pieces, because the grunts have more HP than marines do. Finally, the alien turret puts out a huge amount of damage, so every pop-out maneuver carries a greater-than-normal amount of risk.
It’s easy, when designing levels, to focus too much on convoluted setups in order to achieve fresh and increasing challenges. This set piece avoids that nicely. With very simple level architecture, the designers were able to create several minutes of high-tension content. That content fits within the theme of multi-front/surrounded combat and involves the same enemies used elsewhere in that theme. The only thing unusual about the set piece is the one alien turret, which makes a rare appearance here, although a very important one. The turret’s high damage output holds the entire set piece together by preventing the player from storming out into the open.
SET PIECE 14-1: Get in There!
This set piece pits Freeman against a bunch of Headcrabs and a Buillsquid among a small maze of crates. This set piece is much easier than the previous set pieces in this theme, which serves two purposes. The first purpose is to give the player a break; not every set piece can be harder than the last, or else the game will feel grueling. Even with through content punctuating the set pieces, it’s still a good idea to vary the difficulty for the sake of pacing.


The more specific purpose of this setup is to prepare the player for the set piece that comes next. This set piece is a smaller, less-dangerous version of the large, complicated room filled with spec-ops assassins. Hunting Headcrabs and dodging the Bullsquid through the many boxes is a fairly neutered version of the surrounded combat the player has been experiencing. It’s the same type of setup, however, that the game has used throughout this segment, and it’s a good way of preparing the player for what comes next.
SET PIECE 14-2: A Grove of Boxes
Although the previous set piece is exists in part to prepare the player for this one, this set piece is definitely the child of the final set piece in chapter 9. The spec-ops assassins return in an evolution/expansion of their appearance in that chapter. This time around the set piece is much larger and the vertical aspect is significantly more dangerous.


The first thing to notice here are the catwalks, from which the enemy can fire down on Freeman no matter where he is in the set piece. One of the assassins is always located on this level, but more of them can climb to that level based on how their evasive maneuvers take them away from Freeman’s approaches.

This is still a cover set piece, however, and the player can get into some fairly secure locations from which to try and ambush an assassin. Most of the secure cover spots are along the perimeter, and there are a lot of ways to force the assassins into narrow apertures. This won’t solve all of the set piece’s problems, however, since the assassins are hard to hit and will run or leap away, causing the player to lay another trap. Moreover, there is at least one (assassin on the top floor (others can retreat there) that will not get trapped and must be fought at long range from the catwalks.
SET PIECE 14-3: Grunt Sandwich
This is the final iteration in the succession of three teleporting-grunt set pieces. The big evolution this time is that it’s completely impossible to see the first grunt coming, as he stands just behind these doors.


After killing him, the second grunt will spawn behind Freeman, all the way at the other end of the tunnel, while a third grunt will charge in from the room Freeman just opened. The position of the teleporting grunt is another evolution, since he’s almost out of the battle and can be hard to even register at first. There is cover: the player can use the narrow aperture or the object on the left side of the tunnel (facing the original direction). No matter what the player does, though, Freeman is vulnerable from one angle. A couple of things keep this set piece from being too hard. First, the grunt in the back is so far away that his seeking bullets sometimes lose their mark. Secondly, the grunt charging from the other side is at a height disadvantage. Thirdly, the triggers in this set piece don’t happen that fast; the charge and teleport are not hot on the heels of the first grunt opening the door. So while many new players will take considerable damage in this set piece, it doesn’t turn into a shooting gallery quite as quickly as some other set pieces in this segment. This is good, because the cover here is not particularly robust.
Segment 7: Past and Future
This segment is not really linked by a common design theme, but rather is a collection of set pieces that exist after the climax of the cover theme. The design team was not entirely out of ideas, but they may have been out of time and resources to develop them. Thus, three things happen.
- Most of the set pieces late in the game are arena-style set pieces, with a decent amount of platforming mixed in.
- A couple of really great ideas for cover appear but are never developed.
We’ll take a look at each of these things in the following set pieces, but I want to point out that any connection between them—aside from “they don’t fit with the rest of the game”—is tenuous at best. Many of these set pieces (especially 17-4 and 17-5) are actually quite fascinating, however, and are still worth examining.
SET PIECE 14-4: Roaming the Halls
This set piece begins the increased simplicity of the fourteenth chapter and sixth segment. After triggering a script by entering the Lambda Core armory, several enemies will appear at different spots in the connecting walkways of the complex. Altogether, it's very simple.


The player can use any of several apertures in the set piece because the halls and doors are narrow enough that they do provide some cover, and the enemies start far enough away that the player can actually take advantage of the cover momentarily. Fighting these scattered enemies in shallow cover is highly reminiscent of Doom and W3D, and is definitely a step back for Half-Life’s cover theme, although it’s clearly not an arena. Another unusual occurrence in this set piece is that the grunt opposite the armory will charge towards Freeman. It's hard to say whether it's the distance and obstructions that cause this or whether this one grunt has an altered behavior script, but the results are the same. The player has to quickly dispatch as many enemies as possible before additional scripts kick in, because after the grunt, more Vortigaunts can appear (although the teleport scripts are not as reliable here as elsewhere).

Besides the fact that many set pieces are like this in chapter 14, there's also the fact that the player has just obtained a gluon gun and is probably supposed to take advantage of its BFG-like power to melt the grunt in a matter of seconds. Again, though, this would be a throwback to the days of Doom and its many ridiculous weapons.
SET PIECE 14-7: Whack-a-Gaunt
Although it is not the first set piece to feature triggered teleports, no set piece in the game recalls the switch-triggered monster closets of Doom as much as this one. The set piece begins with only a few scattered Headcrabs running around and one Vortigaunt below the catwalk towards the back.

Trying to shoot the first Vortigaunt will pull Freeman in. It's quite easy to use the catwalk for cover, but passing a point on the catwalk triggers the teleportation of another Vortigaunt on the same level behind Freeman.

This forces the player to finish off the first Vortigaunt and take cover, of which there is a good bit. The machine in the middle of the room serves well as cover because the Vortigaunt on the catwalk isn't able to come down. The player can pop Freeman in and out of cover in the typical way.
The cover is more important than it initially seems, because a classic monster closet situation is in order once the player hits the switch on the machine. After hitting the switch which activates the tank/generator setup for this wing of Lambda Core, two more Vortigaunts will teleport in. One of them appears virtually on top of Freeman—there's no solving that except by shooting it as quickly as possible. This is classic Doom/Quake-style design.

The second Vortigaunt teleports on top of the catwalk, meaning that cover is once again available to use in the more typically "Half-Life" style.
SET PIECE 14-10: A Series of Unfortunate Grunts
This set piece could easily be divided into three separate set pieces and examined that way, but because the cover play is mostly the same throughout it, I consider it one set piece. Moreover, there’s no other content between the beginning of this set piece and the end, suggesting a unity of action that is typical of a set piece. It takes place in a long hallway with a bend at the end. There is one piece of object cover but several alcoves at intervals down the hallway. Upon entering, the player will be surrounded by a Vortigaunt that teleports in, and two grunts (one of which teleports in) beyond the covering crate.


The Vortigaunt teleports in fairly quickly, meaning that the player doesn’t necessarily have to face a surprise multi-front-combat situation. The fight is still dangerous though, because the two grunts on the other side are close by, and their homing shots will wrap around the crate fairly easily. After this segment, all the enemies will only appear in front of Freeman. Down the hall, two more Vortigaunts and a grunt will teleport in once Freeman gets close enough.


The only real cover is the alcoves in the wall that lead to locked doors. Those alcoves are shallow, and recall the end of the second segment in chapter 8, where the player has to run station-to-station between small alcoves of cover.
The only big difference between the first part of this set piece and its predecessors in chapter 8 is the presence of the steam vents which the player can activate as an added weapon against the enemies. The problem is that Vortigaunts and grunts don’t have a strong tendency to charge at Freeman. The steam also does not do that much damage. So while the steam can be useful, it’s not that useful. The player is much better off defeating the enemies with weapon fire rather than using the steam as a trap. The last part of the set piece is almost like something out of W3D. After the second set of enemies, the player will round a corner right into two grunts who were waiting there during the firefight.


This situation, in which the player opens a door or rounds a corner to be surprised by an enemy standing only a few feet in front of their character, is a staple of Doom and W3D. Why it makes an appearance in this set piece isn’t clear or consistent with the rest of the game, but it is extremely effective as a surprise. After fighting the second group of enemies only a short distance away from the third, very few first-time players are going to be expecting that third group to be standing there so patiently.
SET PIECES 17-4 AND 17-5: Moving Cover & Dangerous Cover
These two set pieces, both of them quite brief, are fantastic examples of paths that the developers could have taken with more time, but which didn't end up happening. Set piece 17-4 puts Freeman in front of an aperture through which numerous enemies come pouring out. This would be a very typical and uninteresting set piece except that the cover is moving.


At regular intervals, grunt barrels move through the set piece. The cover is moving, and it moves at a speed that means the player can temporarily use it to get a good angle or to dodge incoming fire. Moreover, the pieces of cover are fully periodic, so the interruption of the moving cover is entirely predictable. I think the designers could easily have done more with moving cover; it's an idea that could have had its own segment. Perhaps the technology didn't allow that development, or the time constraints did not permit it. Whatever the reason, it's a fascinating idea that didn't get the development it deserved. The second set piece, 17-5, does another interesting thing with cover by making that cover dangerous. The whole point of cover is for it to protect the player, and these barrels do that, but they also place limits on what Freeman can do.


The Vortigaunts and alien overseers in the back of the room are hidden in alcoves that give them a huge firing advantage on Freeman once he crosses into their sights. The player can't get around this by using explosives as he or she normally would. Explosives turn those containers into an army of grunts which will almost instantly deplete Freeman's health with their combined firepower. This idea would probably have been harder to develop into a segment than the previous set piece, but nevertheless there are lots of ways that dangerous cover could have been turned into puzzle-style set pieces.
Cover Theme pt 1 - Back | Next - The Platform Theme